Using React with AdonisJS to handle Auth - Full stack tutorial
- Mahmoud Mousa
- Javascript , Adonisjs
- August 25, 2024
JavaScript is an incredibly versatile language that can be used for both front-end and back-end development. However, building full-stack applications in JavaScript has traditionally been complex and cumbersome. In this tutorial, we’ll explore how to simplify full-stack development using AdonisJS, a framework that brings the elegance of Laravel to JavaScript. AdonisJS allows you to use your favorite front-end framework, such as React, Svelte, or Solid, while providing a cohesive and powerful back-end solution.
In this guide, we’ll walk through building a simple site with user authentication, including sign-up and login functionalities. By the end of this tutorial, you’ll have a solid understanding of how to use AdonisJS to create a full-stack application. We’ll cover setting up the project, creating user models, handling routes, and building the front-end with React. Here’s a preview of what we’ll build:
Prerequisites
In this tutorial I will be using PostgreSQL as our database. This is what I am most comfortable with and what I prefer. Feel free to use any other database engine. Howver, if you are going to use PostgreSQL on Mac, I recommend you install it using Postgress.app and install Postico2 to be able to brwose through your database and inspect the data. AdonisJS requires a Node version of 20 at least as per their docs
- Node.js (V20 or higher)
- PostgreSQL
Setting up an AdonisJS project
First, let’s set up an AdonisJS application. Thankfully there is an excellent initializer package that will help you get started. Let’s run the next command to start the initializer process:
npm init adonisjs@latest fullstack
When running this command for the first time you will be prompted to install create-adonisjs package which you should accept.
There are many flags that you can pass to choose the setup of your project. You can learn more about using the flage here. However, for our usecase we will run through the prompts and choose the options that work for us.
First step you will be prompted to select which starter kit to use. We will use the InertiaJS starter kit. This will allow us to render our favorite frontend framework on the backend and have an experience very similar to NextJS.
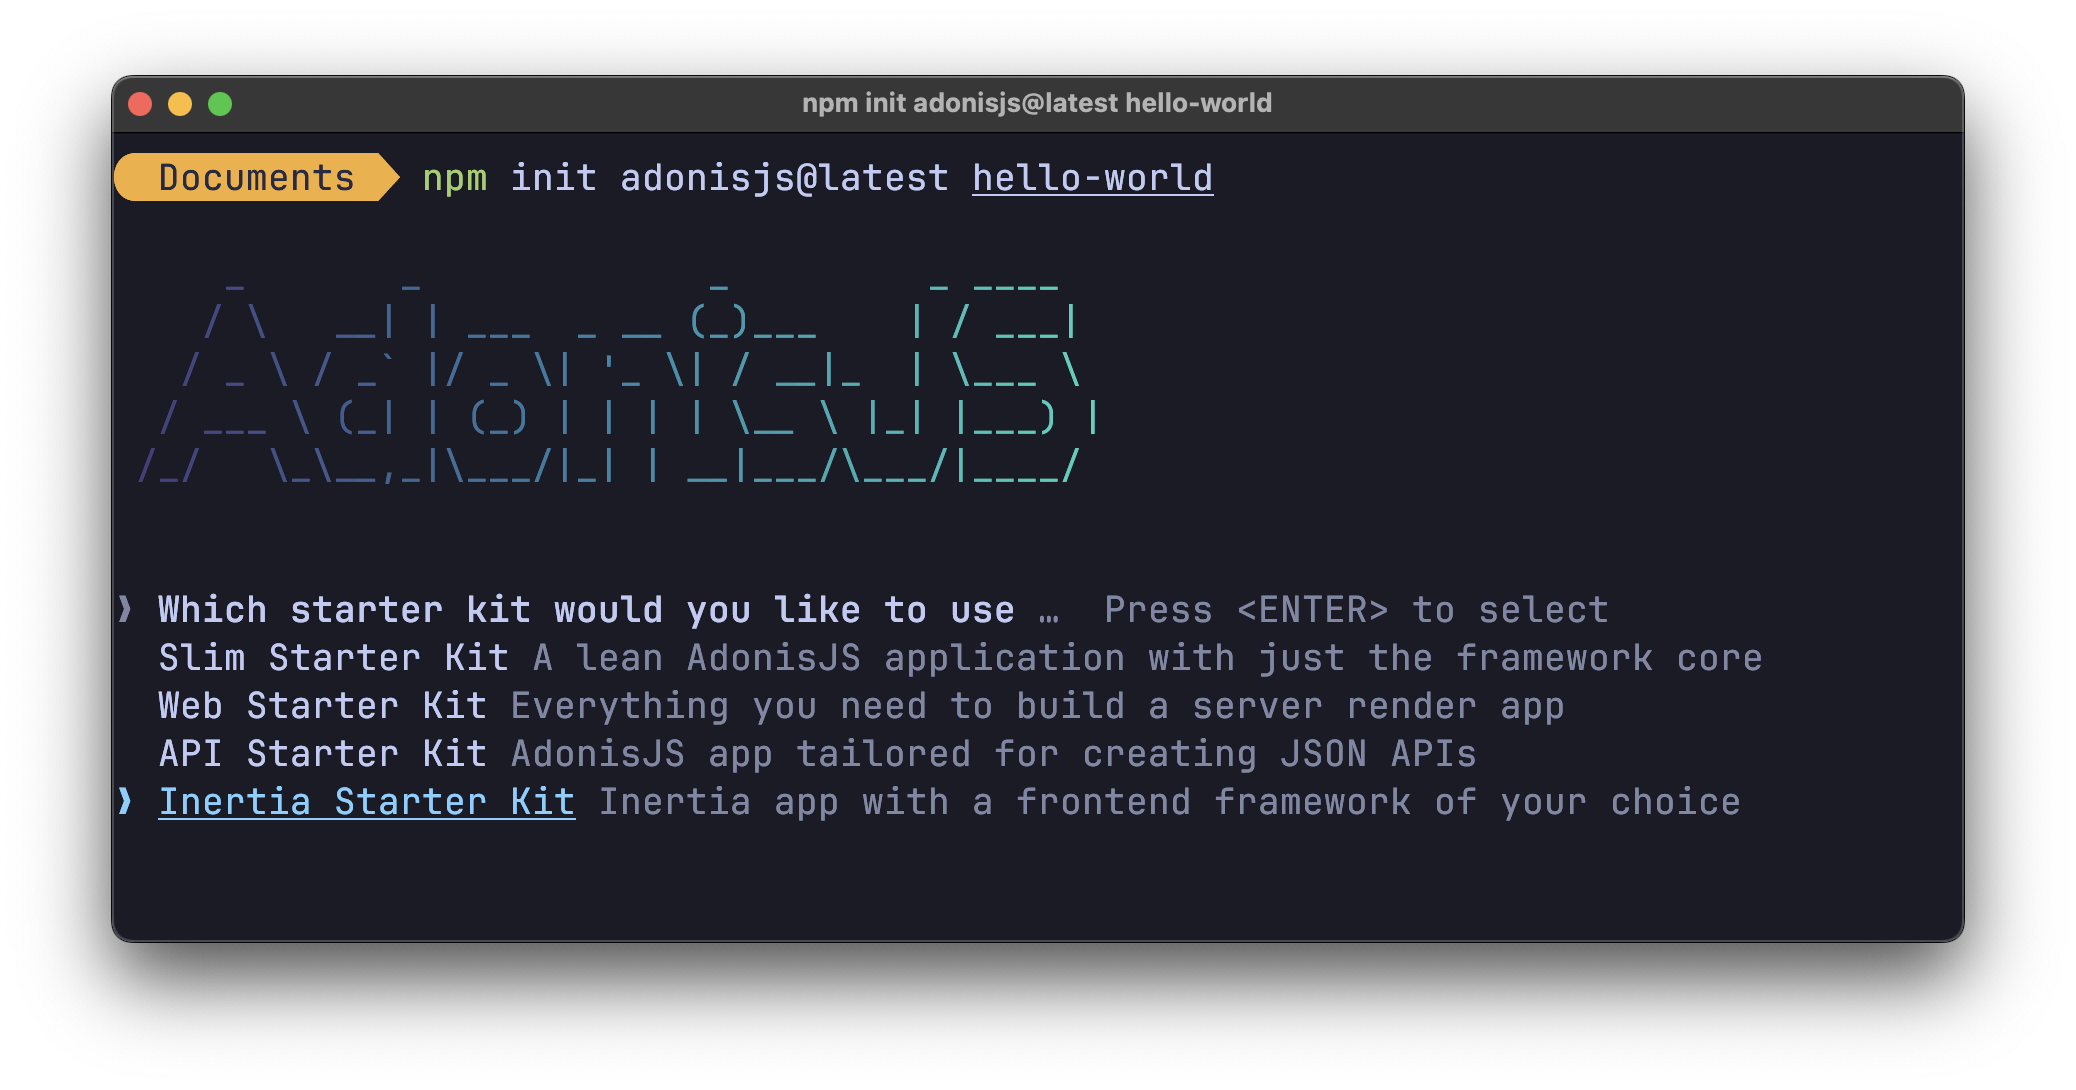
Next we will be promoted to choose which auth guard we want to use to check user sessions. You can read about the different types of Auth Guard supported by AdonisJS on Auth Guards docs. For simplicity we will choose Session auth guard for now.
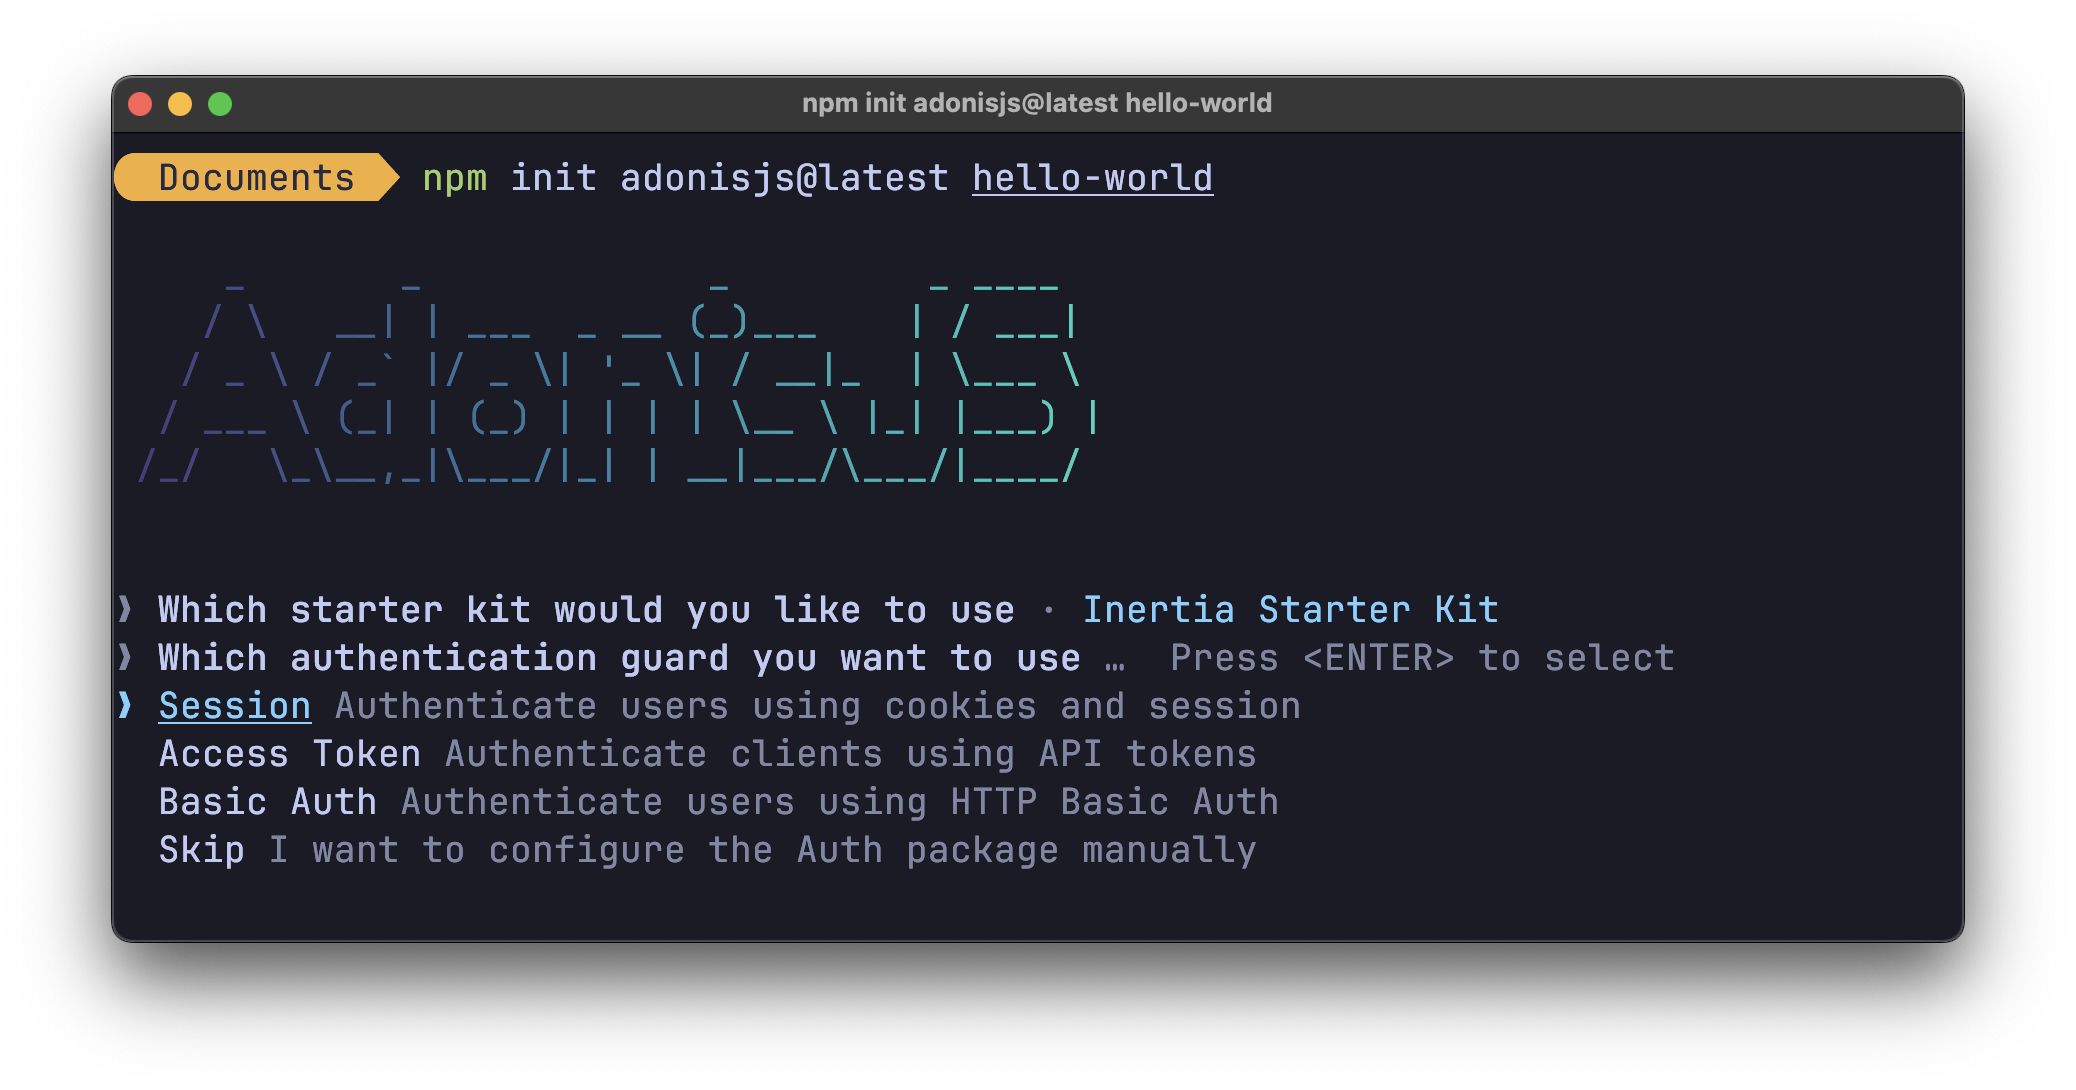
After that we will be prompted to choose our database type, as discussed earlier I wil choose PostgreSQL as I love it and I have it running on my machine.
Finally, I am asked to choose which frontend framework I want to choose to work with InertiaJS. I will choose React to make sure I have a very similar experience to NextJS.
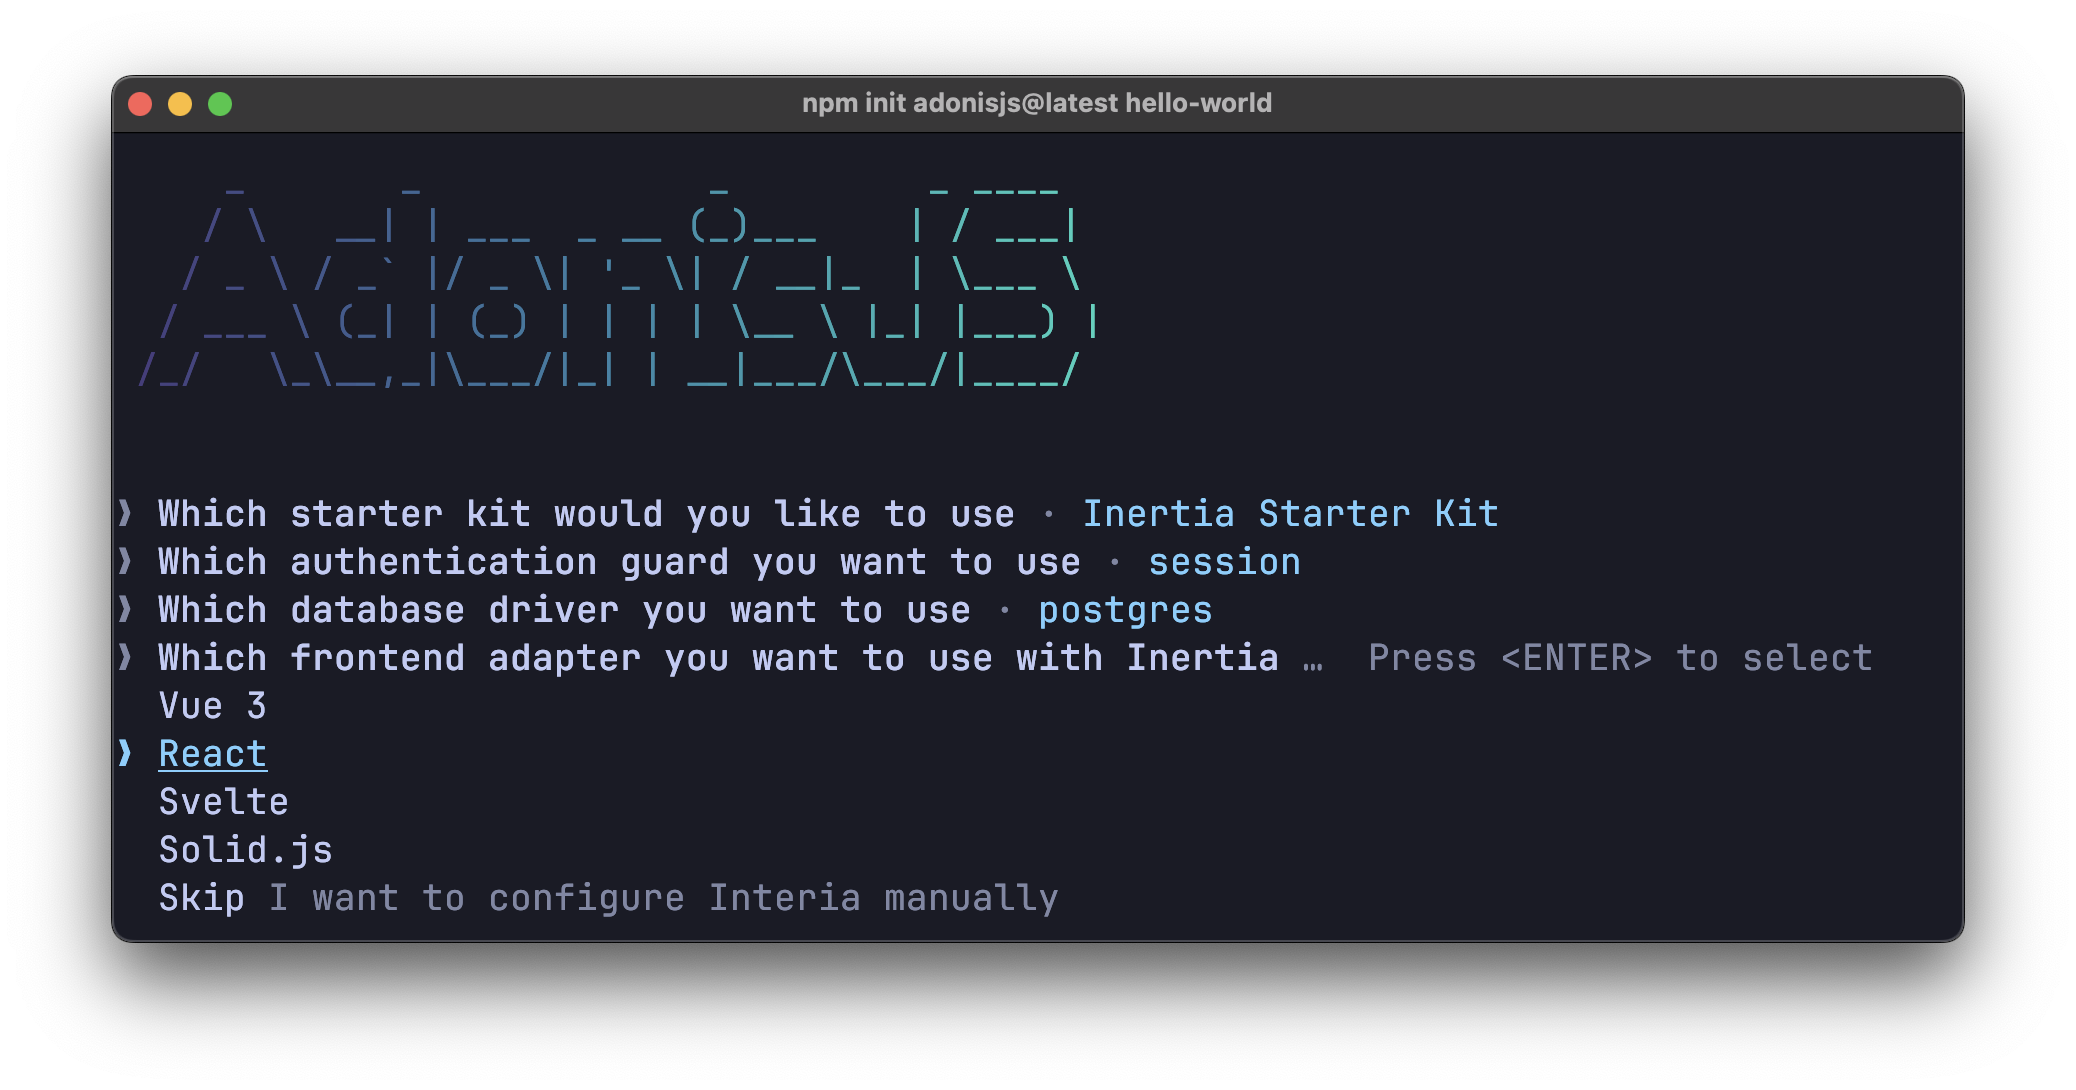
Make sure you answer yes to enable SSR on our application with InertiaJS.
Once the loading is done, our application is ready in fullstack folder. Navigate into the folder and open it in your favorite code editor.
Setup database
Make sure you make a fresh database for the new application. This will depend on how you manage your Postgres server locally. If you are using my same setup with Postico, you can connect to local server and create new database.
After that you need to enter the name of your database into your .env file.
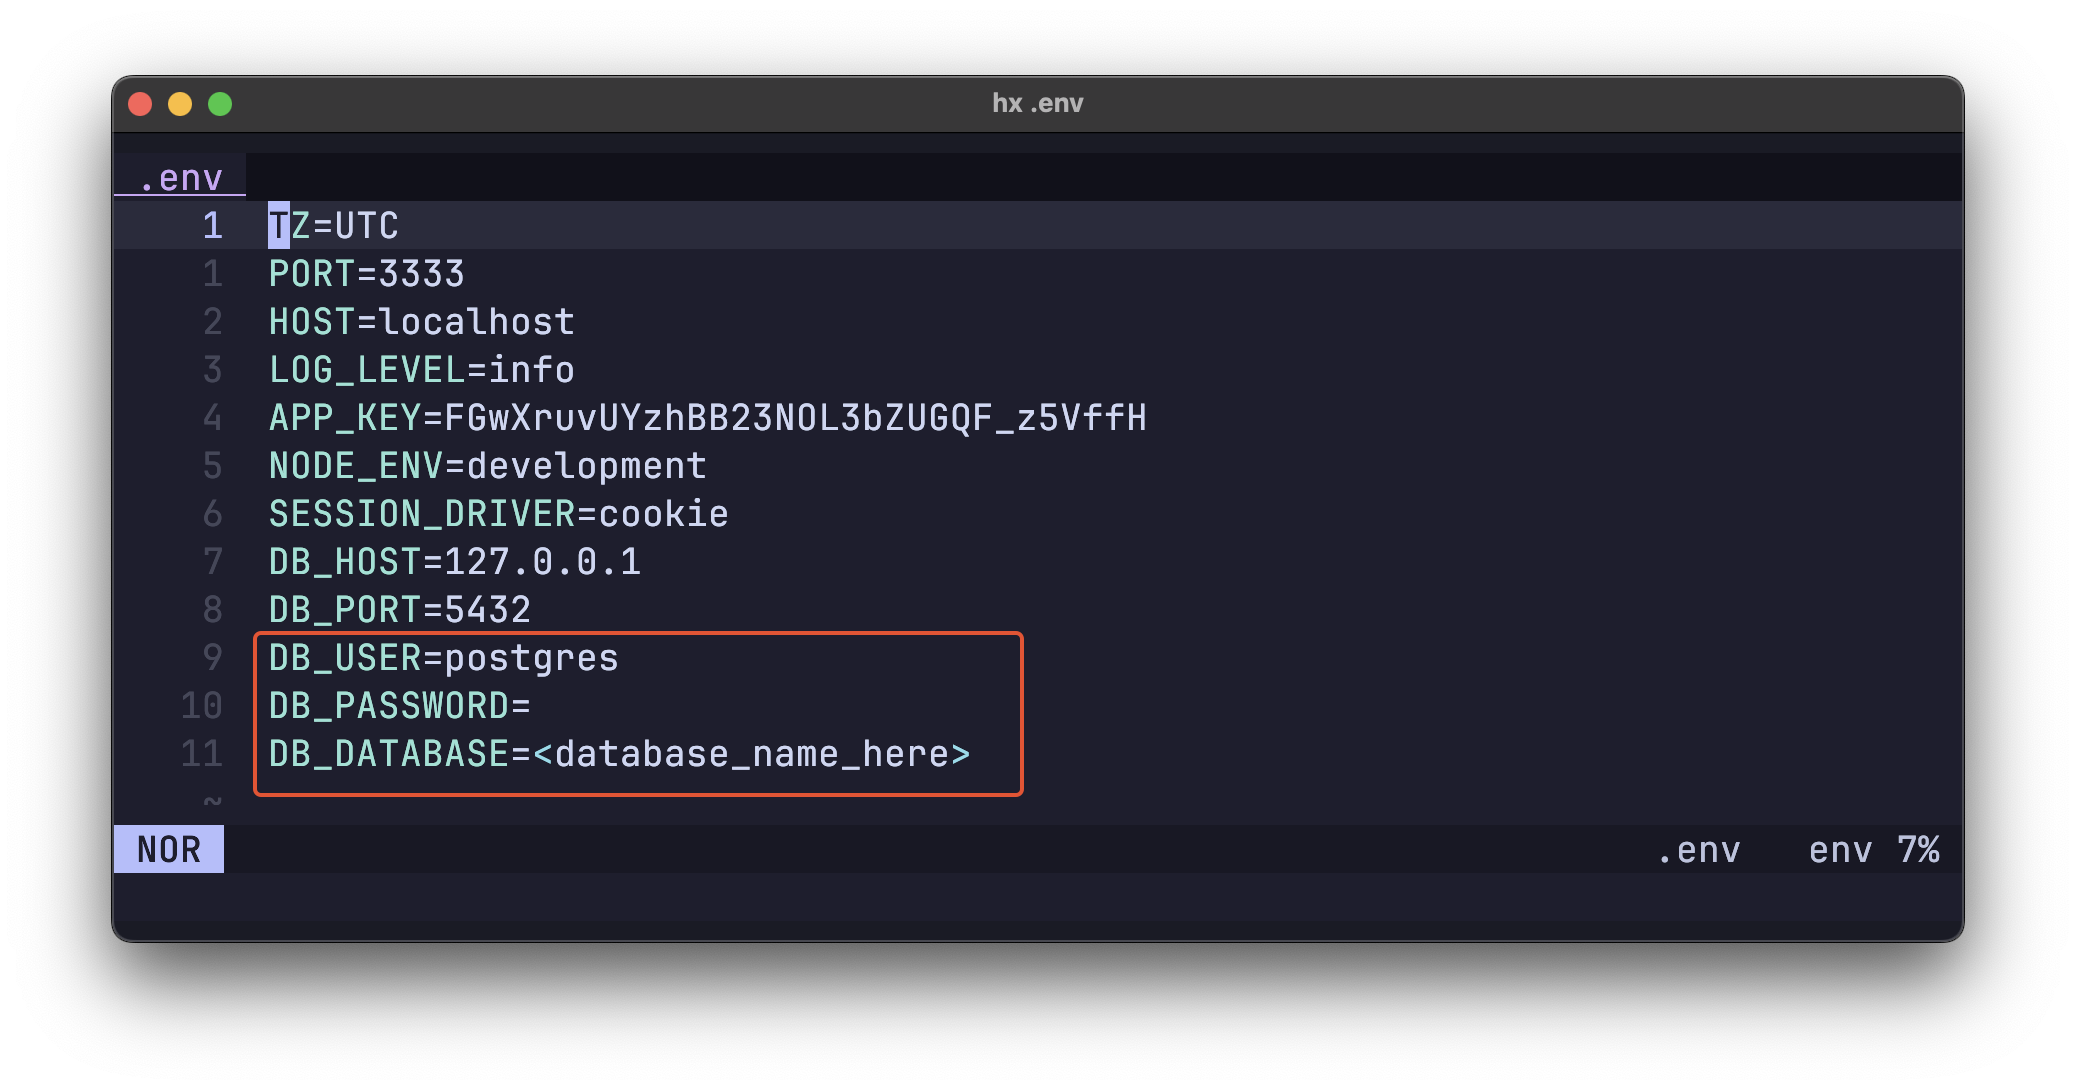
Once you have done that, you are ready to run your new application.
npm run dev
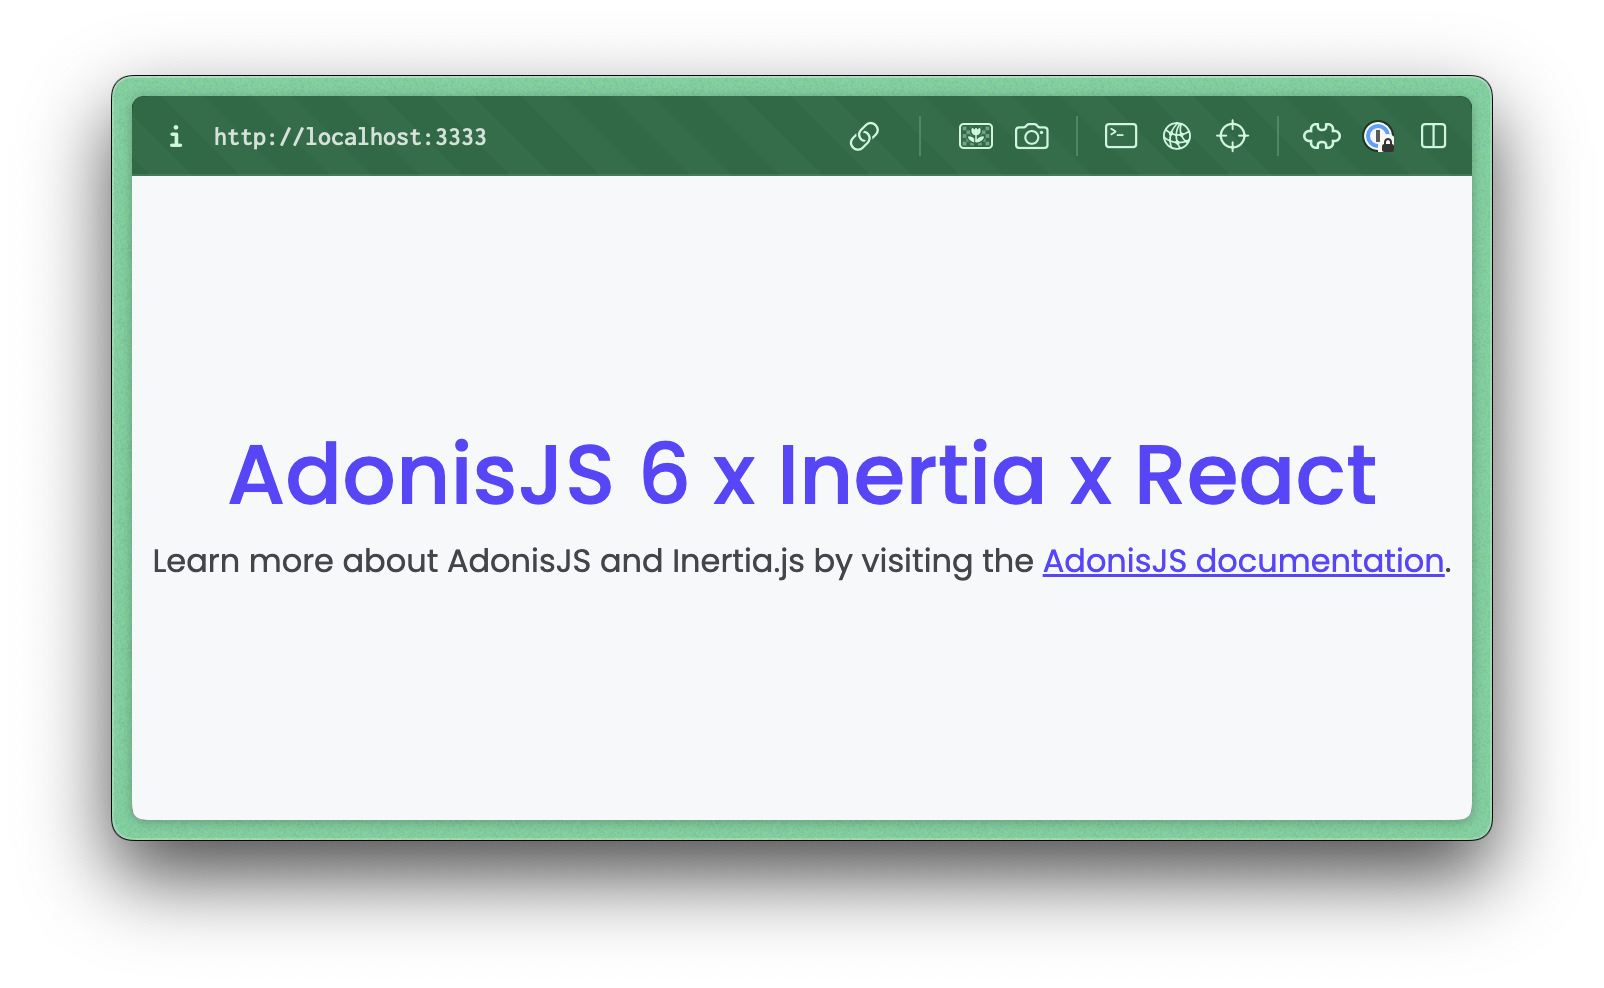
You should be able to visit http://localhost:3333 and see our AdonisJS application running.
Initializing the User Model
To mange our own auth system in our application, first thing we need to do is to intialize our User model. This means creating the table in the database and corrosponding model class that we will use on our code to do CRUD operations for the users table.
Thankfully, AdonisJS comes with all that out of the box. If you take a look at xxx_create_users_table.ts file inside migrations folder, you will see AdonisJS have already created a migration script for us to init our users table in the databse.
Now in this tutorial, I will show you the most minimal way to handle auth. You can always change the user table to have any details that you want, In my case I will remove the full_name column to make things easier. So the migration script looks like this now:
export default class extends BaseSchema {
  protected tableName = 'users'

  async up() {
    this.schema.createTable(this.tableName, (table) => {
      table.increments('id').notNullable()
      table.string('email', 254).notNullable().unique()
      table.string('password').notNullable()

      table.timestamp('created_at').notNullable()
      table.timestamp('updated_at').nullable()
    })
  }

  async down() {
    this.schema.dropTable(this.tableName)
  }
}
We also need to clean up the same property from the user model. Which can be found in /app/models/user.ts. I will remove the fullName column property to make things match with our database schema. The model looks like this now:
export default class User extends compose(BaseModel, AuthFinder) {
  @column({ isPrimary: true })
  declare id: number

  @column()
  declare email: string

  @column({ serializeAs: null })
  declare password: string

  @column.dateTime({ autoCreate: true })
  declare createdAt: DateTime

  @column.dateTime({ autoCreate: true, autoUpdate: true })
  declare updatedAt: DateTime | null
}
We are now ready to run the migration to apply the changes to your database. Thankfully, AdonisJS comes with excellent CLI called ace that makes this trivial. Run the following:
node ace migration:run
Now we are ready to handle user creation, login and logout. Before we do that, I want to show you how InertiaJS is used in this application now.
Exploring InertiaJS setup
Using the Inertia kit from AdonisJS starter, intertia is already configured to render pages in the application out of the box. The way this work is we define different routes in start/routes.ts file that need to render React pages. The name of the page should be matched with a .tsx file inside inertia/pages/ folder.
Open the start/routes.ts file and you can see the home page route there as an example:
router.on('/').renderInertia('home', { version: 6 })
Notice how we pass the { version: 6 } to the page - those are page props.
Notice also the name home is corrosponding to the file inertia/pages/home.tsx.
So this line bascially says to Adonis, when you get a request at / use inertia to render the home page and pass those props in.
Now that we understand how inertia is used to render the home page and pass props to it, let’s change the home page design and add login and signup buttons in a navigation header.
Changing the home page
Before we start changing the syntax inside of the home page, I will import the PicoCSS library to help me get basic styling.
Importing PicoCSS
Open up the file resources/views/inertia_layout.edge in the project. This file is very simialr to _document.tsx file in NextJS. There we will add the following script tag to include PicoCSS.
<link
  rel="stylesheet"
  href="https://cdn.jsdelivr.net/npm/@picocss/pico@2/css/pico.min.css"
>
Next we need to cleanup the css that came with the starter kit.
Open up the file inertia/app.tsx and remove line number 4 which has this import import '../css/app.css';
Now we are ready to use PicoCss and change our home page.
Updating the home page file
In the inertia/pages/home.tsx let’s replace the content with the following super simple HTML that will add a simple nav along with the login and signup buttons.
export default function Home() {
  return (
    <>
      <Head title="Homepage" />

      <div className="container">
        <nav>
          <ul>
            <li>
              <strong>Acme Corp</strong>
            </li>
          </ul>
          <ul>
            <li>
              <Link href="/login">Login</Link>
            </li>
            <li>
              <Link href="/signup">
                <button className="">Join Us</button>
              </Link>
            </li>
          </ul>
        </nav>
        <hgroup style={{ textAlign: "center" }}>
          <h1> Welcome to our fullstack site! </h1>
          <h4> This is the real deal! 🚀</h4>
        </hgroup>
      </div>
    </>
  );
}
Naviting to our http://localhost:3333/ we see the following homepage instead:
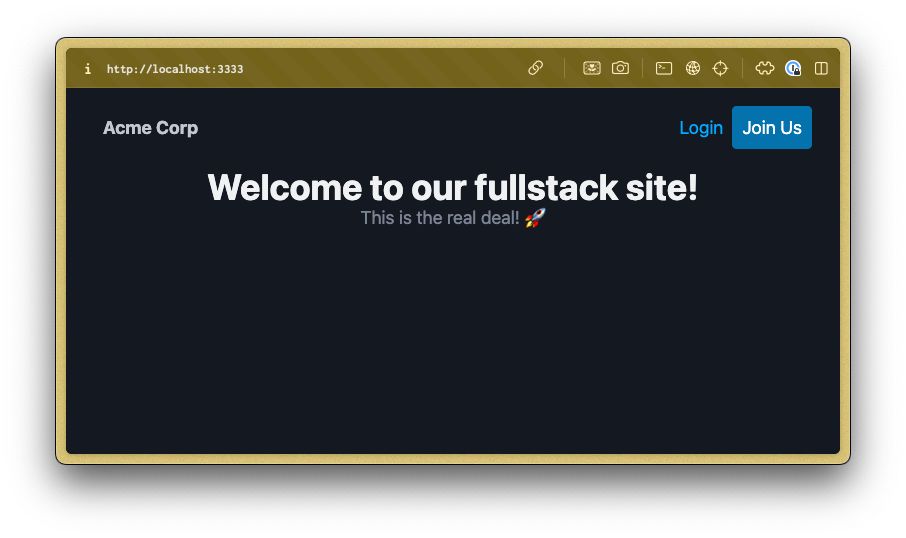
Notice the Signup and Login buttons on the top right hand corner of the page. Currently neither of those buttons work. Let’s start by working on the signup workflow.
Adding the signup workflow
Adding the signup page route
The first step in adding the signup workflow is to add the page route that will tell AdonisJS to render an inertia page for our signup page. We do this in start/routes.ts file. We can add one more route to render an inertia page signup on /signup as follows:
// start/routes.ts
router.on("/").renderInertia("home");
router.on("/signup").renderInertia("signup"); // Route for Signup page
With this route in place, we can headon to build the said signup page for inertia to render.
Building the signup page
This is a very simple React page. Any React libray will work here - No issues at all.
I will build a super simple React signup form that will accept two inputs email and password. Let’s have a look:
export default function Signup() {
  // State to keep form values
  const [values, setValues] = useState({
    email: "",
    password: "",
  });

  // Simple on change handler
  function handleChange(e: React.ChangeEvent<HTMLInputElement>) {
    const key = e.target.id;
    const value = e.target.value;
    setValues((values) => ({
      ...values,
      [key]: value,
    }));
  }

  // Simple submit handler
  function handleSubmit(e: React.FormEvent) {
    e.preventDefault();
    // Send form values to /api/auth/signup which we will make next
    router.post("/api/auth/signup", values);
  }

  return (
    <main
      style={{
        display: "flex",
        flexDirection: "column",
        alignItems: "center",
        justifyContent: "center",
        height: "100vh",
      }}
    >
      <Head title="Signup" />
      <h1>Join our community</h1>
      <form onSubmit={handleSubmit}>
        <label htmlFor="email">Email:</label>
        <input id="email" value={values.email} onChange={handleChange} />
        <label htmlFor="password">Password:</label>
        <input
          id="password"
          type="password"
          value={values.password}
          onChange={handleChange}
        />
        <small id="email-helper">
          We'll never share your email with anyone else.
        </small>
        <button type="submit">Submit</button>
      </form>
    </main>
  );
}
You can see that we are sending the form values to via POST method to /api/auth/signup. We currently don’t have this route yet. Let’s create it by adding a route group in our start/routes.ts file:
// api
router
  .group(() => {
    router
      .group(() => {
        router.post("/signup", [AuthController, "signup"]);
      })
      .prefix("auth");
  })
  .prefix("api");
Notice the use of the Router.Group here to add prefix to our routes. This means that when we get a POST request on /api/auth/signup we should trigger the signup method on the AuthController. Right now we don’t have an AuthController; let’s add one
Adding the Auth Controller
Making a controller for your Auth is pretty standard and recommended way to handle all auth logic. While we could have added our logic directly onto our routes file, it’s really not recommended; Controllers serve as a logical cohesive place for all common logic to live. If your application gets bigger, consider using services that gets called from within your controller. Controllers are a pivotal part of the MVC way of building web apps. MVC is battle tested; it won’t let you down.
Create the AuthController using the ace CLI:
node ace make:controller auth
Open the app/Controllers/Http/AuthController.ts file and add the signup method:
export default class AuthController {
  async signup({ auth, response, request }: HttpContext) {
    const user = await User.create(request.body());
    // Login the newly created user
    await auth.use("web").login(user);
    // Redirect the user to dashboard afterwards
    response.redirect("/dashboard");
  }
}
Notice how simple this is to do in AdonisJS. You don’t have to worry about which ORM you are using or anything like that. Moreover, our logged in customer will always be part of HttpContext under the auth property. So if a customer is logged in or not, is always availble for us for any request that passes by the middleware.auth().
You can see we redirect the user to the dashboard route afterwards. Currently this route doesn’t exist. Let’s create it!
Creating the Dashboard page
Firstly, we need to Define a route for the dashboard in start/routes.ts. We can do so by adding this part below.
// authed views
router
  .group(() => {
    router.on("/dashboard").renderInertia("dashboard");
  })
  .use(middleware.auth());
Notice that we have this use() part attached to the router group. This is very essential. This means adonis will automatically check if the user is logged in or not for any route in this group. You can learn more about this auth_middleware by checking out the file app/middleware/auth_middlware.ts. If the session check failed, we will redirect to login page - this all comes configured by default in AdonisJS.
Time to reate the dashboard.tsx page under the inertia/pages directory:
import { Head, router } from "@inertiajs/react";

export default function Dashboard(props: { user: any }) {
  return (
    <>
      <Head title="Dashboard" />

      <div className="container">
        <nav>
          <ul>
            <li>
              <strong>Acme Corp</strong>
            </li>
          </ul>
          <ul>
            <li>{props.user.email}</li>
            <li>
              <button
                onClick={() => {
                  router.post("/api/auth/logout");
                }}
              >
                Logout
              </button>
            </li>
          </ul>
        </nav>
        <h1>Logged in user details:</h1>
        <pre>{JSON.stringify(props.user, null, 2)}</pre>
      </div>
    </>
  );
}
Pay close attention to the props this page is expecting; it’s expecting to receive a user prop. Now in other fullstack solutions, NextJS (not a fullstack framewrok btw), this is the time to reach for Redux or any other global state management library. Thankfully, with this setup you don’t have to worry about that at all. AdonisJS and Inertia are integrated in a very cool way. Let’s have a look to see how we can pass any value from out HTTPContext to the our pages.
If you have a look at config/inertia.ts file - You will find this property called sharedData. Any properties passed here will by default make it to our inertia pages as props. Let’s pass the user from the context as below:
const inertiaConfig = defineConfig({
  /**
   * Path to the Edge view that will be used as the root view for Inertia responses
   */
  rootView: "inertia_layout",

  /**
   * Data that should be shared with all rendered pages
   */
  sharedData: {
    user: (ctx) => ctx.auth?.user, // passing user as props
    errors: (ctx) => ctx.session?.flashMessages.get("errors"),
  },

  /**
   * Options for the server-side rendering
   */
  ssr: {
    enabled: true,
    entrypoint: "inertia/app/ssr.tsx",
  },
});
That’s it, if you navigate to /dashboard after signing up now, you should be able to see all your user details:
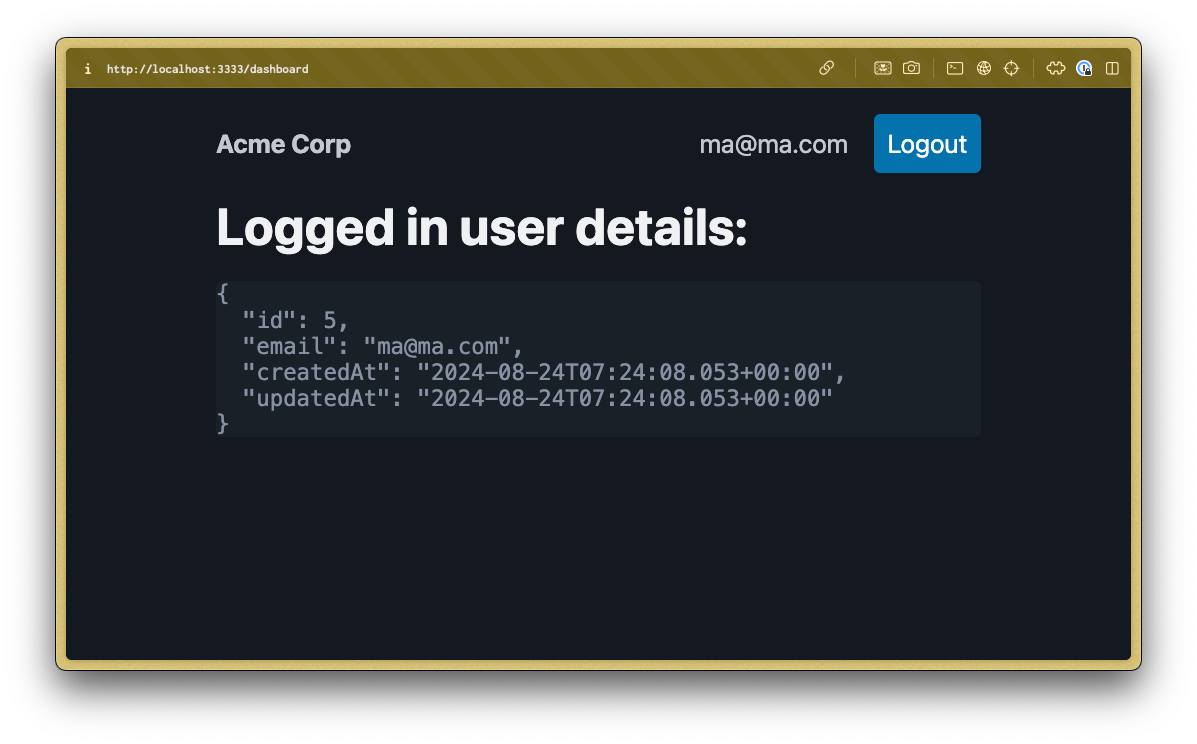
GREAT! It’s all coming together. We can now signup and access the dashboard page.
Next let’s implement the logout route to the link on this button can start working:
Handling logout workflow
Adding the logout route
Let’s modify the API part of our routes.ts file to include a logout route attached to AuthController:
// api
router
  .group(() => {
    router
      .group(() => {
        router.post("/logout", [AuthController, "logout"]); // You will get error ; method doesn't exist yet
        router.post("/signup", [AuthController, "signup"]);
      })
      .prefix("auth");
  })
  .prefix("api");
You will notice we will get red squiggly lines under the route path for /logout. That’s because this method doesn’t exist yet. Let’s add it!
Adding the logout method
This is faily simple. We need to add a simple logout method to our auth_controller.ts as follows:
  async logout({ auth, response }: HttpContext) {
    await auth.use("web").logout();
    response.redirect("/");
  }
You can see this code is trivial - we simply logout the user, then redirect to home screen.
Now try to click on the logout button from the dashboard page - You should land on home screen~! 🚀
Great what’s left now if to implement the login flow - Let’s do that!
Handling the login flow
This won’t be any difference from other flows either - first we add the route for the login page:
Add route for login page
We need to add a new route for our public login page in start/routes.ts file - so now this part look like this:
// public views
router.on("/").renderInertia("home");
router.on("/signup").renderInertia("signup");
router.on("/login").renderInertia("login");
This is fairly simple - it binds the route /login to render the inertia page called login. We don’t have that now. So let’s add it
Build the login page
Create a file called login.tsx inside of inertia/page/ folder. This file is almost identical to the signup page, but with the main difference being the route where we send the form values. Let’s have a look:
import { router } from "@inertiajs/react";
import { Head } from "@inertiajs/react";
import { useState } from "react";

export default function Login() {
  const [values, setValues] = useState({
    email: "",
    password: "",
  });

  function handleChange(e: React.ChangeEvent<HTMLInputElement>) {
    const key = e.target.id;
    const value = e.target.value;
    setValues((values) => ({
      ...values,
      [key]: value,
    }));
  }

  function handleSubmit(e: React.FormEvent) {
    e.preventDefault();
    // We post to login instead in this case.
    router.post("/api/auth/login", values);
  }

  return (
    <main
      style={{
        display: "flex",
        flexDirection: "column",
        alignItems: "center",
        justifyContent: "center",
        height: "100vh",
      }}
    >
      <Head title="Login" />
      <h1>Login to your account</h1>
      <form onSubmit={handleSubmit}>
        <label htmlFor="email">Email:</label>
        <input id="email" value={values.email} onChange={handleChange} />
        <label htmlFor="password">Password:</label>
        <input
          id="password"
          type="password"
          value={values.password}
          onChange={handleChange}
        />
        <button type="submit">Submit</button>
      </form>
    </main>
  );
}
Aside from the route, both login page and signup pages are almost identical. It’s up to you to implement a more fancy and vibrant design that suits your needs.
Handle login api request
To handle the login API request, we need to create an API route and a controller method. We need to define a new API route in start/routes.ts:
// api
router
  .group(() => {
    router
      .group(() => {
        router.post("/login", [AuthController, "login"]);
        router.post("/logout", [AuthController, "logout"]);
        router.post("/signup", [AuthController, "signup"]);
      })
      .prefix("auth");
  })
  .prefix("api");
Currently we don’t have that login method on our controller. So let’s ddd the login method to the AuthController:
  async login({ auth, response, request }: HttpContext) {
    const { email, password } = request.body();
    const user = await User.verifyCredentials(email, password);
    await auth.use("web").login(user);

    response.redirect("/dashboard");
  }
The login method is fairly trivial in this case with AdonisJS! We simple call the verifyCredintials method on the user model and get the correct user or an error is thrown. In this case we are ignoring the error and just using the returned user. We simply login the said user and send them to dashboard page.
That’s it! If you navigate to home page now and click on login, you should be able to login with your account and land back on the dashboard page!
Here is our final code for routes.ts file:
import AuthController from "#controllers/auth_controller";
import router from "@adonisjs/core/services/router";
import { middleware } from "./kernel.js";
// public views
router.on("/").renderInertia("home");
router.on("/signup").renderInertia("signup");
router.on("/login").renderInertia("login");

// authed views
router
  .group(() => {
    router.on("/dashboard").renderInertia("dashboard");
  })
  .use(middleware.auth());

// api
router
  .group(() => {
    router
      .group(() => {
        router.post("/login", [AuthController, "login"]);
        router.post("/logout", [AuthController, "logout"]);
        router.post("/signup", [AuthController, "signup"]);
      })
      .prefix("auth");
  })
  .prefix("api");
The AuthController:
import User from "#models/user";
import type { HttpContext } from "@adonisjs/core/http";

export default class AuthController {
  async signup({ auth, response, request }: HttpContext) {
    const user = await User.create(request.body());

    await auth.use("web").login(user);
    response.redirect("/dashboard");
  }
  async logout({ auth, response }: HttpContext) {
    await auth.use("web").logout();
    response.redirect("/");
  }
  async login({ auth, response, request }: HttpContext) {
    const { email, password } = request.body();
    const user = await User.verifyCredentials(email, password);
    await auth.use("web").login(user);

    response.redirect("/dashboard");
  }
}
That’s all you need to do! Now you have a fully functional auth system in a server side rendered React application with all the power of AdonisJS behind it.
Conclusion
In this tutorial, we’ve built a simple full-stack application using AdonisJS and React with Inertia.js. We’ve covered user authentication, including sign-up, login, and logout functionalities. AdonisJS provides a powerful and elegant framework for building full-stack applications in JavaScript, making the development process much more straightforward and enjoyable.
For more details and advanced features, refer to the AdonisJS documentation. Happy coding!
That's not good! 😢
Thank you! You just made my day! 💙


